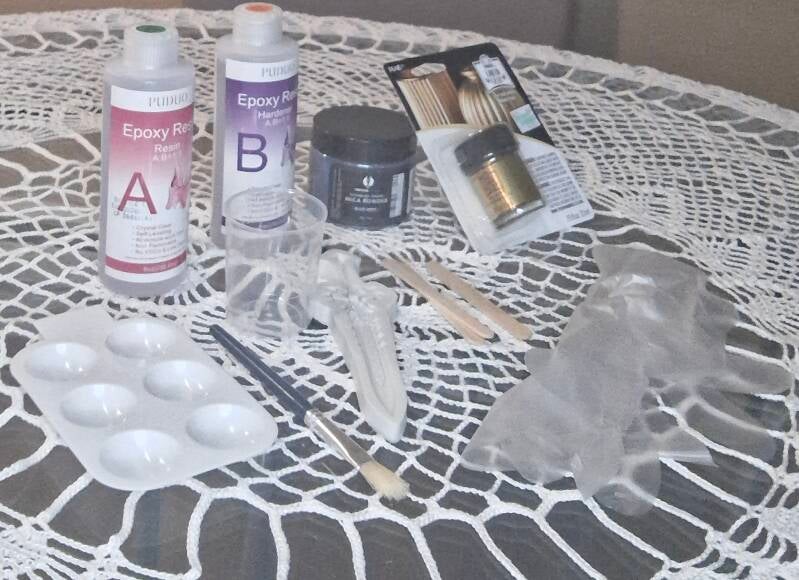
Materials:
Taoxibei Sword Polymer Clay Mold: $5.99/ Amazon
Epoxy Resin Crystal Clear Kit: $13.99/ Amazon
Techarooz Blue Grey Mica Powder: $11.99/ Amazon
Liquid Leaf Paint: $5.49/ Hobby Lobby
Tools:
6 pc Filbert Stencil Brushes (Show-offs)- $3.29 / Hobby Lobby
6-Well Plastic Palette (Crafter's Collection)- $1.99 / Hobby Lobby
As this was my first resin project, I was uncertain about the amount of mixture I needed to prepare. As a beginner, I made a choice that I wholeheartedly recommend to fellow resin newcomers: I opted to create a small dagger instead of a larger one. I started by mixing 30 mL of resin with 30 mL of hardener, which turned out to be excessive; I really only needed 10 mL of each.
Next, I added a scoop of blue-grey mica powder using a popsicle stick and stirred the mixture gently for three minutes. Afterward, I poured the mixture into the mold. Fortunately, I didn’t encounter any bubbles this time. To protect my project from dust, I covered the mold and waited 12 hours before carefully removing the resin from it. I then placed the resin on a flat surface to allow it to cure for another 12 hours.
While waiting, I cleaned the mold and set it aside for 6 hours before preparing a second batch of resin for the remaining half of the dagger. Feeling more confident this time, I measured the correct amount of resin and even took a small scoop with a popsicle stick. However, I wasn't as gentle while stirring the mixture, which resulted in a bubble forming when I poured it into the mold. Fortunately, I managed to eliminate the bubble by popping it with a toothpick. After waiting another 12 hours for the resin to cure enough to remove it from the mold, I glued the flat ends of the two dagger halves together using Mod Podge. This allowed me to align the second half with the first, preventing any gaps between the pieces. I then waited an additional 12 hours for the dagger to fully harden.
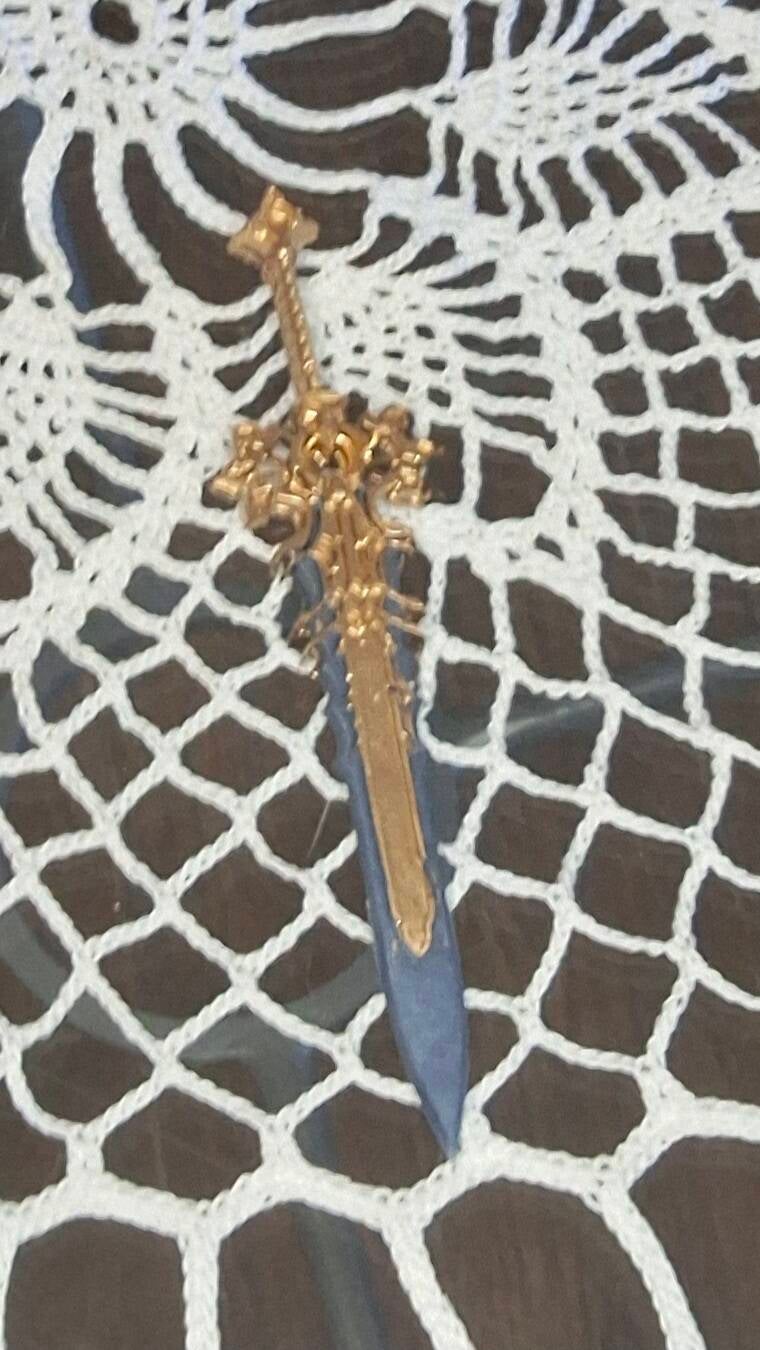
After allowing the dagger to fully harden, I took out the gold leaf paint and carefully applied it to the handle. Admittedly, it was a bit tricky to determine where the gold should go, so I referred to a picture of the dagger on Amazon for guidance. After painting, I patiently waited an hour for the paint to dry. Ultimately, I am thrilled with how my dagger turned out; it looks quite charming! I'm even contemplating creating a larger dagger in the future or perhaps making some dice just for the fun of it.
Add comment
Comments