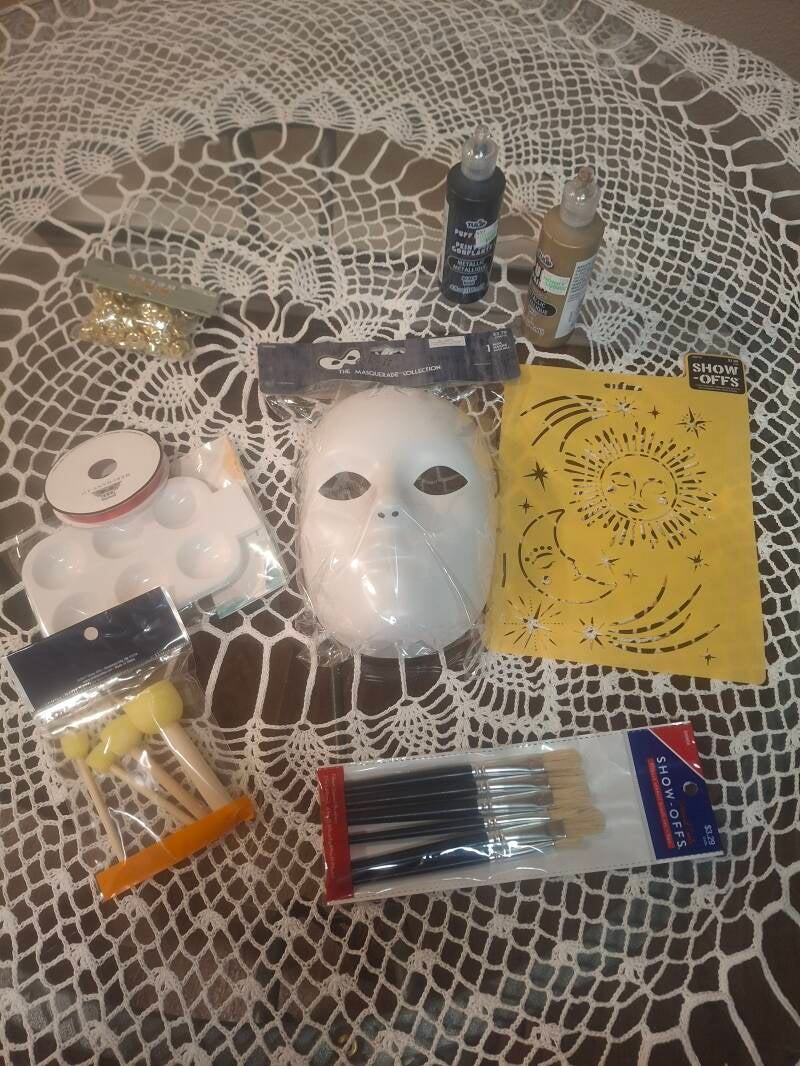
Materials:
Mascaraed Mask-$3.79 / Hobby Lobby
Celestial Stencil- $1.99 / Hobby Lobby
Gold Bells (0.59 mm)- $1.49 / Hobby Lobby
Scarlet Polyester Ribbon (0.6 cm x 5.49 m)- $2.99 / Hobby Lobby
Metallic Black Paint (Tulip 118 mL)- $4.49 / Hobby Lobby
Metallic Gold Paint (Tulip 118 mL)- $4.49 / Hobby Lobby
Tools:
6 pc Filbert Stencil Brushes (Show-offs)- $3.29 / Hobby Lobby
4 pc Foam Pouncers (Show-offs)- $1.99 / Hobby Lobby
6-Well Plastic Palette (Crafter's Collection)- $1.99 / Hobby Lobby
The Crafting Experience:
I wish I could say that I am at least decent at painting; unfortunately, I am horrible at it. No matter how hard I try, my brush strokes are very visible, and the results often fall short of my expectations. However, I find solace in the fact that I take after the Bennet sisters from Pride and Prejudice and love to laugh, even at myself. Embracing my shortcomings in painting reminds me that creativity is about joy and expression, not perfection. So, I continue to pick up the brush, not for the sake of creating a masterpiece, but for the sheer delight of the process and the laughter that follows my colorful mishaps, and this project was no different.
To begin my mask project, I chose to paint it entirely black. Initially, I thought the largest foam pouncer would be the ideal tool for the job. However, I quickly realized this approach was ineffective. It either left unsightly white and black stripes across the surface or created a bubbled texture when I bounced it. If I had been crafting a different type of mask, perhaps a more abstract one, I might have embraced that textured look. Instead, I opted for a stencil brush, which allowed for a smoother, yet still brush streaked, application. I applied two coats to ensure a rich, thick black finish, leaving it to dry overnight before moving on to the next steps.
The following day, I resolved to enhance the masks by painting the lips and eyeliner in a striking gold. I recognized the need to work in sections to prevent the gold paint from smudging while using the stencils. As I waited for the lips and eyes to dry, I took some time to finalize my design plan.
I was certain I wanted to paint stars next to the outer eye lines, along with additional stars and a moon. However, I struggled to decide on their placement. Ultimately, I chose to position the moon on the forehead and angle two smaller stars along the cheekbones, giving the impression of freckles.
Just when I thought I had mastered the process of decorating my mask, I encountered a setback while using a foam pouncer to paint stencil stars and a moon. Unfortunately, the paint kept seeping under the stencil, prompting me to switch to a stencil brush. However, I still struggled to achieve a clean design. It seemed that either I wasn't applying enough paint or it continued to seep beneath the stencil.
Feeling a bit frustrated, I decided to browse Amazon for inspiration on freehand painting. After some searching, I finally found the motivation I needed and set to work freehand painting my designs with one of the stencil brushes. Once I completed my artwork, I left my mask to dry.
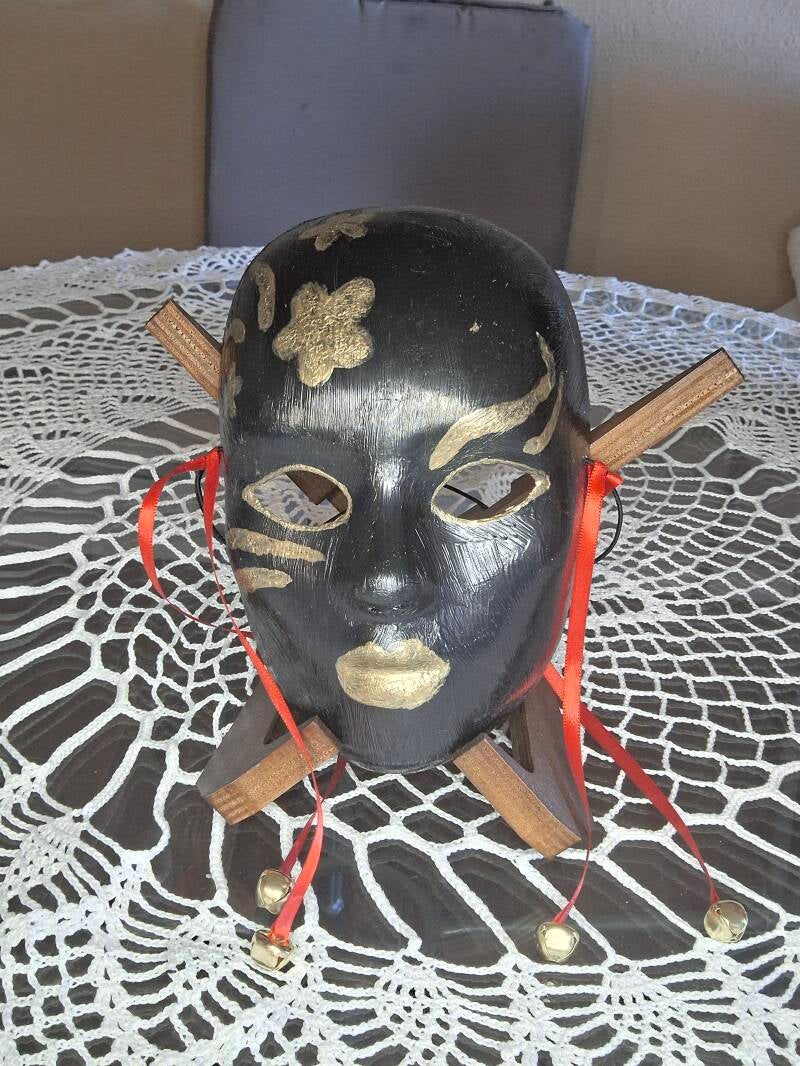
In the final step, I threaded a vibrant red ribbon through four golden bells and secured them to the mask using Mod Podge as the adhesive. The glue takes a few minutes to dry, so I had to pinch the two sections of the ribbon together while it set. Despite the challenges I faced throughout the project, I must admit that my mask turned out even better than I had anticipated. I would definitely wear it if I were a character in Hidden Storm, embarking on raids alongside Alicia.
Add comment
Comments